

The Pandemic has forced us to stay inside and find ways to still work and do things in the world. As life goes on even during the pandemic, the new normal has set in. Online meetings, webinars, live online events, and work-from-home, has become the new normal for businesses and professionals.
Video conferencing has been an important aspect to connect employees, businesses, and audiences and Zoom has become a staple for video conferencing. Zoom not only lets you organise private meetings and conferences but also schedule public meetings, webinars and presentations.
How to integrate Zoom with WordPress?
You can very easily set up Zoom on your WordPress website. All you need is a Zoom account and the Video Conferencing with Zoom plugin. You can find the plugin for free on WordPress.org’s plugin repository.
In this guide, we will take you through easy steps to integrate Zoom with your WordPress dashboard. We will also look into how to schedule meetings and a few key features of Zoom integration. This guide covers the following topics:
- Connecting you website with your Zoom account
- Scheduling Zoom meetings and displaying them on your website
- Tips for creating a secure and trouble-free experience
Let’s dive in!
Connecting you website with your Zoom account
The first aspect is to connect your website with your Zoom account. To begin with, you can first download and install the plugin. Once you install it, you can see a new tab “Zoom Meetings” on the left-hand sidebar on your dashboard.
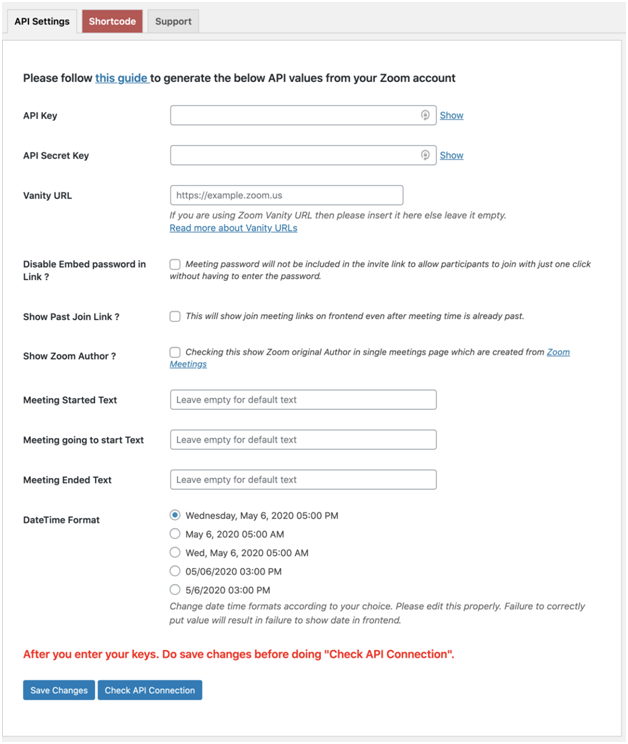
Now, we need to configure our settings, which includes generating an API from our Zoom account.
To generate an API, follow the steps given below.
Step 1: Sign in to your Zoom account. Once you are logged in, go to, https://marketplace.zoom.us/develop/create/.
Step 2: Click on JWT and hit the create button.
Step 3: It will ask you to name the App. You can name it whatever you want. It is easier to remember, if you name it the same as your domain name.
Step 4: Fill in the required contact information and hit continue.
Step 5: The screen will give you your API Key and Secret. All you need to do is copy them and paste them in your API Key and Secret boxes on your dashboard.
Step 6: Back on your dashboard, under the Zoom Meetings tab, click on the “Save Changes” and then click “Check API Connection.”
By now, you must have successfully connected your Zoom account with your WordPress website. Once we are connected, all we need to do is to learn to schedule meetings and display them on the website.
Scheduling Zoom meetings and displaying them on your website
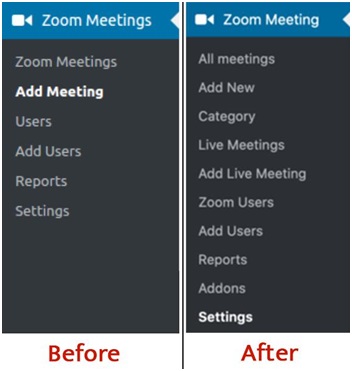
Once you have successfully integrated Zoom with WordPress using API, your Zoom Meetings navigation menu expands from being this to becoming this.
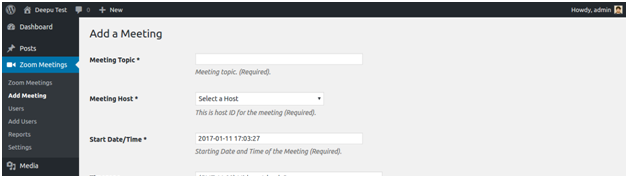
You can straight away go to Add New to add a new meeting. Just like any other post or page, this works similarly. You can see a new screen where you need to fill in the meeting information.
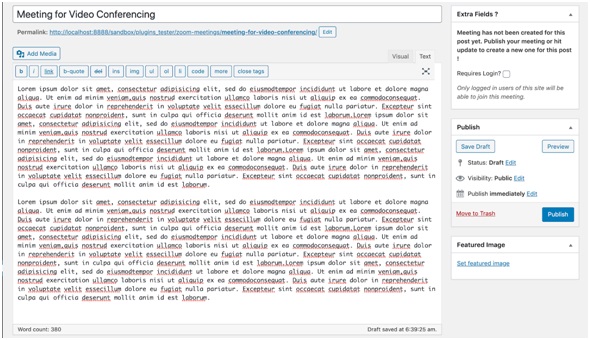
You can begin by giving your meeting a Title/Topic. You can even give a description to the scheduled meeting, just like any other post. From the right-hand side bar, you can select a featured image for your meeting and also add a category. In case you schedule multiple meetings, both public and private with varying individuals and groups for multiple purposes, it is best to categorize your meetings for better organization.
Now you can fill in the Zoom meeting details by scrolling down to the bottom of the page. Here you will find the Zoom details section.
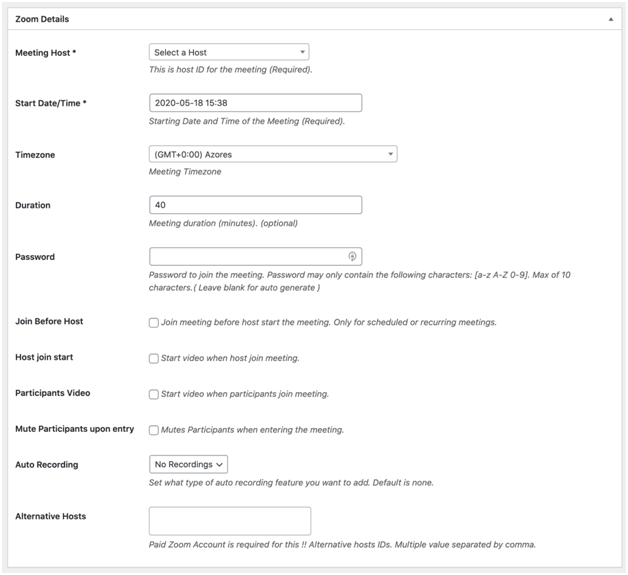
You can select a meeting host and schedule it for a particular date and time. You can set the duration of the meeting as well. In order to secure your meetings from unwanted or uninvited guests, you can enable password protection. Thus, any individual who wants to join the meeting has to enter through a valid password.
You can enable auto recording, just in case you want to revisit the meetings. There are many more features here that we will discuss in the last section. Using these features can make your meetings more secure and protect the attendees’ privacy.
After filling the details, click on the Publish button on the right-hand sidebar. After publishing, you can go to your Zoom account and view the details of your scheduled meeting at display there. A new post link will also be visible on your site, which can be shared with people so they can view your meetings details. The new meeting post on your website will automatically pick up the style and settings of your theme. You can even add custom style to the meeting using CSS properties.
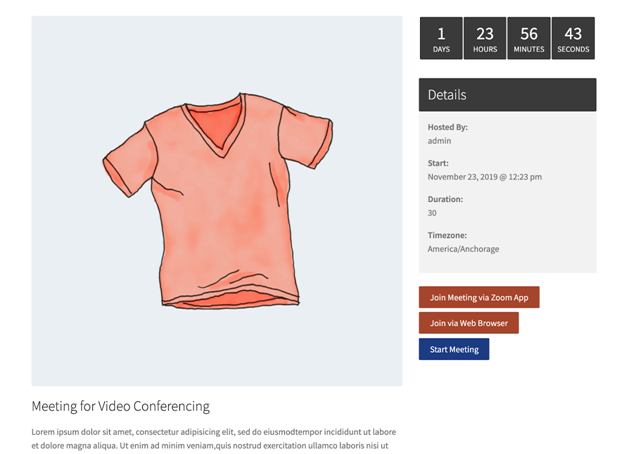
From this new post on your website or the shared link, you or other attendees can join the meeting either through the Zoom App or using the Web Browser. The admin can start the meeting by clicking on Start Meeting button. After publishing, the plugin also generates a shortcode for your meeting details. You can paste this code anywhere on your website, to display your meeting details there.
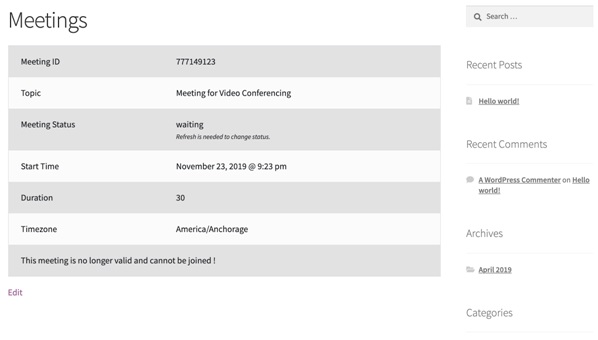
You can categorize your meetings and display them on a separate page. This is helpful if you organize multiple meetings for different audiences and purposes. Zoom offers a lot of ways to creatively display and organize your meetings on your website.
Tips for creating a secure and trouble-free experience
People can be notorious. Often people spam open meetings, troll other attendees and might share inappropriate things on screen and on chat. However, Zoom offers a few features that are simple in functionality but can easily bring down such activities. While creating the meetings, you can set a few preferences that can easily avoid uncomfortable conditions.
If your meeting is not public but for a private audience, or a limited audience, the first measure you can take is to enable password protection. This lets only those users in who have the correct password. It can filter out a lot of uninvited people.
A lot of people might join the meeting before the host and can be troublemakers. There is an option to disable join before host option. By disabling this, people can join the conference only once you are there. This makes it easier to monitor and control the call.
You can gain more control by have access to muting audio and video of participants. If you have a large no. of participants, you can disable screen-sharing and video.
Conclusion
Zoom is now an irreplaceable necessity for professionals. It offers a tightly feature-packed service that has made it easier for professionals and audiences to connect. Integrating and using the Zoom plugin on your WordPress is super easy and makes your work more convenient and efficient.