
Having a business nowadays requires both a perfect service regarding your products or services, as well as having a responsive and working website. Your website is a place where you can ensure you have a great first impression.
This is the place your visitors and potential future customers are most likely to visit first, so you want to make sure it works and looks great. You can create a website quickly, but it is very important you create a website that will represent you and your business. You want your site to enforce the image you want. There are some questions that your website should answer, such as if the business is working and at what times, what do you offer, as well as if the website is responsive, does it appear reliable and credible, can the visitor understand what he or she is looking at, etc.
As part of a successful website, there are some must have sections that you need to have, such as an about or bio page (this is one of the most frequently visited pages), contact information (this is necessary so you can communicate with your customers or visitors), email sign up (you need this for email marketing campaigns and customer segmentation), testimonials (this is extremely important so your visitors can see you are taking your job seriously and are doing a good job), social media links (nowadays, visitors see your social media accounts as an extension of your website so you want to ensure those links are working and that you are communicating regularly with your followers), list of products or services (that way your visitors know exactly what you are offering), and a blog section where you write regularly about the newest updates in the market or industry, as well as any news relating to your business, products, or services.
In short, you need to remember to build trust and credibility!
However, there is a section that many forget to create, or if they do create it, they don’t spend enough time to make sure it is good enough. We are talking about an author box. This is probably the most overlooked part of a site. Here, you should, in a few sentences, describe who the author(s) of the blog post is (are) and have your readers connect with them. You need to ensure the author box fits your overall theme and links to other social media account’s (the easiest way of doing this is with a plugin and we explain how later in the text).
What is an Author Bio?
These days, on multi-author websites especially, an author bio is a must. No matter the industry or business, having an author bio helps establish a good reputation, build trust, and create familiarity with your visitors. Having an author bio tells your visitors who you are, what you do, and why you should be seen as reliable author or an expert in the field. Without it, your visitors don’t know who wrote the post and if it is reliable and accurate.
The author’s bio section doesn’t have to be long, but it should include just enough information to let your visitors connect with you on a more personal basis and just enough so you can establish yourself as a person of knowledge and reliability on the topic.
Here are some rules to follow on how to write a professional bio:
- Write in the third person (makes you seem trustworthy and professional)
- List provable facts (you don’t want to list lies and lose your credibility and customers)
- Keep the writing short, but interesting (your visitors want to know more about the author, but don’t make it too long; they don’t want to know everything about them)
- List relatable facts (the ones that can make the author seem honest, experienced, and credible)
Elements of the Author Bio
Other important elements of an author bio, besides the bio itself, should include links to social media accounts. After reading a short author bio, a visitor might like to get to know the author more. That is where your links to their other social media accounts might help.
Add links to sites like Instagram, Twitter, Facebook, LinkedIn, or Pinterest, depending on your site or blog post. Not only will this help your visitors connect better with your authors, but you can improve your SEO and increase following across different social platforms. The easiest way of adding the links to your author box is by using a plugin. You can simply download, activate it, and you are good to go!
Just like with images on coming soon pages, another important element is a picture that clearly portrays an author’s face. Having a profile picture enables your visitors to connect with your authors better, and they will start to create and feel a sense of familiarity and trust. Therefore, they will be more likely to believe that what you are writing about in the blog post is credible and important. You can add a profile photo by enabling it on an author’s Gravatar account, or they can choose which one to upload. Again, an easy way to do this is by using a plugin.
Your author box should be interesting and attractive. Make sure it complements your website theme and the overall design (think fonts and colors). To do this, you need to check which plugins allow you to change and customize your author box fully so you can take advantage of this feature.
If you want to know which plugin lets you do all of these things, keep reading!
Which Plugin to Use?
There are hundreds of author box plugins you can use to create a decent author box. Some are free and some come at a cost.However, besides all of these plugins, there is one we recommend using, as we think is the best for quick and easy author box set up.
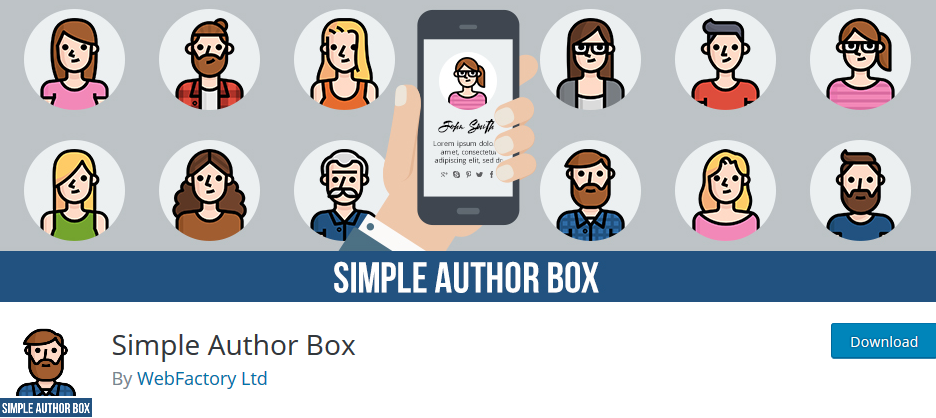
The plugin we recommend you use is the Simple Author Box plugin, a free WordPress plugin (there is a pro version with more features) that creates professional and modern-looking author boxes. It is mobile responsive and will work well on any device (laptop, PC, tablet, and mobile phone). It supports up to 30 social media profiles and you can display authors’ names, theirgravatar pictures, and a short bio. It is customizable so you can edit it to make sure it will fit your overall theme. You also get RTL and AMP support.
You can download it from a WordPress directory (this is a free version). You can get the pro version of Simple Author Box Pro here.
The pro version has more than 40,000 active users and a great 5-star rating. With the pro version, you can assign posts to guest authors as well as add multiple authors to a boxplot. It has simple to use features and seamless integration with WordPress (it will look similar to WordPress, so it is easy to edit).
You can decide how the author box links will behave (whether they will open in a new tab or if you want to apply a no-follow feature). You can adjust it to fit your overall theme or choose one from pre-made templates for a quick set up. Moreover, you can add over 45 social icons to author boxes to make it easy for your readers to follow them.
You will also get great support if you have any questions.
The pro version has 3 pricing plans, $499/year for up to 30 sites, $69/year for up to 3 sites, and $29/year for 1 site.
Conclusion
The author box is a must have section on your website. Having this on your site makes you bond and connect with your visitors, build trust, credibility, and create a sense of familiarity with your authors.
To create one quickly, we recommend using a Simple Author Box plugin that lets you make great author boxes. You can edit and customize them any way you want to, add their social media links, aGravatar picture, and assign more than 1 author to a blog post. In short, it is a great plugin!